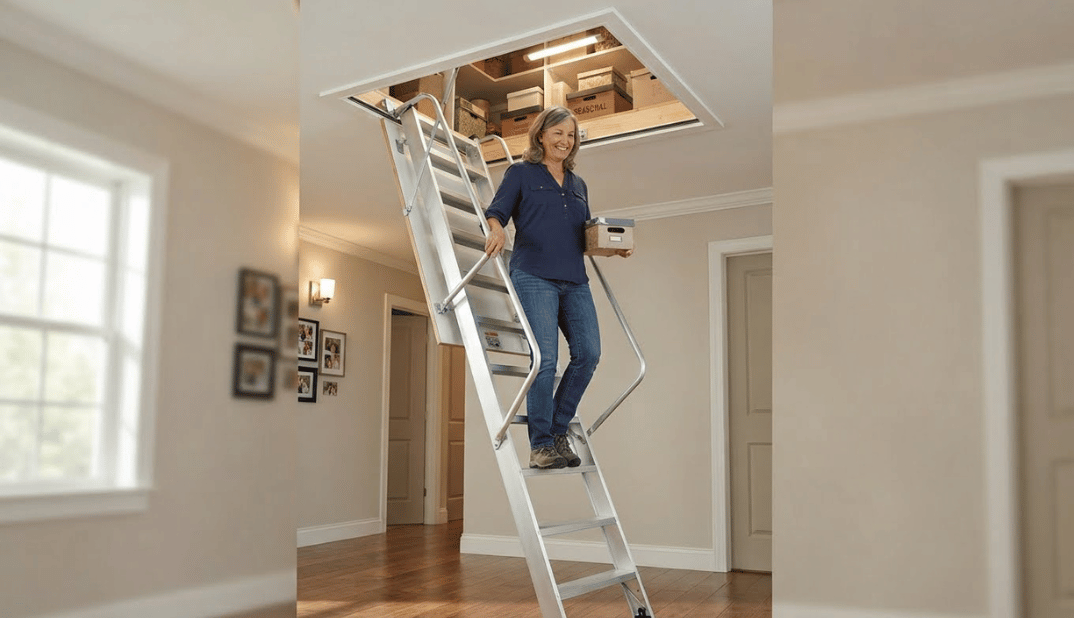
Attic stairs make overhead storage easier to reach without keeping a portable ladder nearby. The right system depends on your opening, ceiling height, available floor space, and how you plan to use it. Safety, insulation, and weight capacity should matter as much as price.
Quick answer: Most homeowners choose folding, telescoping, sliding, or scissor-style attic access systems. Measure the rough opening, ceiling height, landing space, and deployment clearance before buying. Choose a suitable duty rating, secure installation, slip-resistant steps, and an insulated door. Use professional installation if you need to modify framing or ceiling joists.
| Factor | What to Check |
|---|---|
| Common types | Folding, telescoping, sliding, scissor, or fixed stairs |
| Typical materials | Wood, aluminum, or steel |
| Installed cost | Often about $400–$1,000 for standard projects |
| Key measurements | Rough opening, ceiling height, landing length, swing clearance |
| Safety features | Handrail, non-slip treads, locking hardware, secure framing |
| Energy efficiency | Weatherstripping, insulated door, insulated stair cover |
| DIY difficulty | Moderate to advanced, depending on framing changes |
| Professional help | Recommended when joists, trusses, wiring, or ducts are affected |
Key Takeaways
- Measure the opening and surrounding clearances before shopping.
- Folding models work well when there’s enough floor clearance.
- Telescoping designs can fit tighter spaces with less swing room.
- Aluminum is light and corrosion-resistant, while wood can be less expensive.
- Never exceed the manufacturer’s stated load rating.
- Seal and insulate the attic access after installation.
- Structural framing changes often justify hiring a qualified professional.
Understanding the Main Types of Attic Access
Folding models remain common because their sections collapse above the ceiling opening. They provide convenient access while keeping the room below clear between uses. Their main drawback is the floor space needed during deployment.
Telescoping models extend downward instead of unfolding through a wide arc. This design can suit hallways, closets, or rooms with limited landing clearance. They are often made from lightweight aluminum and retract into a compact package.
Sliding models use sections that slide past one another when opening and closing. They can offer high capacity while storing above the ceiling. Always check the manufacturer’s required attic storage clearance before selecting this design.
Scissor-style systems expand downward through a linked metal mechanism. They fit compact openings and often feel rigid when fully extended. Their metal construction can also suit homeowners seeking long service life.
A permanent staircase provides easier daily access than retractable systems. However, they require much more floor area and more extensive structural planning. Larger conversions may overlap with Homoya’s home addition planning guidance when usable living space is being created.
How to Choose Attic Stairs for Your Home
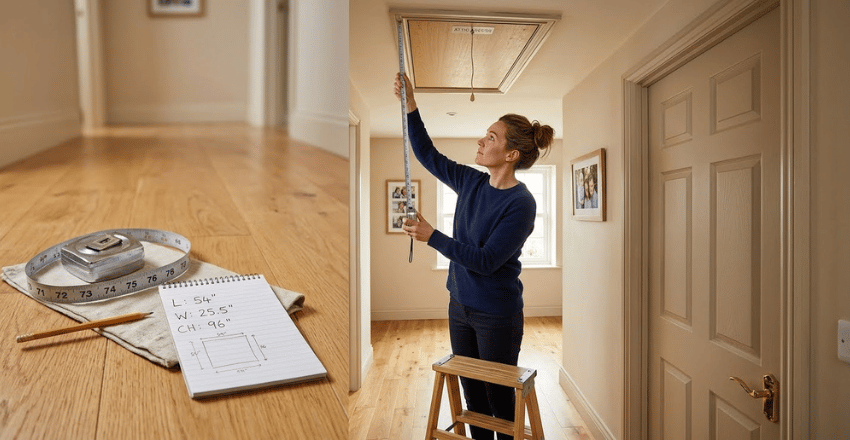
Start with measurements rather than appearance or material. Measure the rough opening’s length and width in several locations. Use the smallest measurement when comparing manufacturer specifications.
Next, measure from the finished floor to the ceiling. Each product supports a stated ceiling-height range. A ladder that is too long or short may sit at an unsafe angle.
Check the room below for landing length and swing clearance. Folding sections need enough open floor area to extend completely. Telescoping designs usually require less horizontal space when deployed.
Consider how frequently you expect to enter the attic. Occasional storage access has different demands from regular equipment maintenance. Frequent use can justify wider steps, a handrail, and a higher duty rating.
Wood, Aluminum, or Steel?
Wood models can provide sturdy access at an approachable price. Their solid steps may feel familiar underfoot. However, wood is heavier and can react to changes in attic humidity.
Aluminum systems are lighter and resist corrosion. Their reduced weight can make opening and closing easier for many users. Look for slip-resistant treads rather than smooth metal surfaces.
Steel or stainless-steel designs target demanding applications and higher capacities. They usually cost more than standard residential models. Their extra strength may be unnecessary for occasional access to household storage.
Material alone does not determine safety or quality. Hardware, hinges, fasteners, tread design, and installation all affect performance. Compare the full product specifications before deciding.
What Size Do You Need?
The rough opening is the framed hole above the ceiling finish. Never assume an existing hatch matches a replacement product. Measure the length, width, and framing orientation before ordering.
Ceiling height determines the ladder’s extended length. The feet should rest correctly on the finished floor when deployed. Improper trimming can leave the system unstable or prevent full extension.
Also inspect joist direction before planning a larger opening. Cutting structural framing can affect the ceiling system above. Trusses should never be altered without appropriate professional guidance.
Ceiling repairs may be needed around a new or enlarged opening. Homoya’s drywall installation guide explains common ceiling-panel methods and framing considerations. Finish work can then restore a clean appearance around the access frame.
How Much Does Installation Cost in the U.S.?
Current 2026 pricing guides place many professional installations around $400 to $1,000. Angi reports a national average near $500 for a typical project. Final costs vary by ladder, location, ceiling height, and structural work.
Simple replacements using an existing opening generally cost less. Creating a new opening can require framing, drywall repairs, trim, and paint. Wiring, plumbing, ducts, or trusses can complicate the project.
Premium materials also increase the total budget. Custom systems for unusual openings or tall ceilings can cost considerably more. Local labor rates and permit requirements also vary by region.
Treat published figures as planning ranges rather than guaranteed quotes. Ask installers to separate product, labor, framing, finish work, and permit costs. This makes competing estimates easier to compare.
Safety Features Worth Prioritizing
A suitable duty rating is essential because users may carry stored items while climbing. The American Ladder Institute’s A14.9 standard covers disappearing household stairways with several rated capacities. Follow the specific capacity and operating instructions provided with your product.
Look for wide, slip-resistant treads and stable side rails. A handrail or grab point can improve balance when entering and exiting. Locking hardware should keep the system secure while fully deployed.
Inspect hinges, springs, fasteners, and feet during routine maintenance. Loose hardware or damaged components should not be ignored. Stop using any system that shifts unexpectedly under load.
Keep the landing area free from boxes, furniture, and loose rugs. Good lighting also makes night climbing safer. Never carry oversized items that prevent secure hand contact while climbing.
Don’t Ignore Insulation and Air Sealing
An attic opening interrupts the home’s ceiling insulation and air barrier. Poor sealing can allow conditioned indoor air to escape. Gaps can also make nearby rooms uncomfortable.
ENERGY STAR recommends weatherstripping around attic access doors and pull-down systems. It also recommends insulating the access cover. Prefabricated insulated covers can create another thermal barrier above retractable ladders.
The U.S. Department of Energy also recommends sealing gaps around the stair framing. Insulation should remain properly contained around the opening. The access panel should close tightly against its weatherstripping.
Address moisture problems above the ceiling before closing the project. Review Homoya’s attic mold removal guide if you see staining or suspicious growth. Solving moisture causes protects both the access assembly and nearby building materials.
DIY Installation or Professional Installation?
Replacing a unit in an unchanged opening can be manageable for experienced DIY homeowners. The work still requires accurate measurements, safe lifting, and secure fastening. Manufacturer instructions should take priority over generic installation advice.
Creating a new opening is a different level of work. Ceiling joists, electrical wiring, plumbing, or HVAC components may be in the way. Structural alterations can also require local permits or professional review.
A professional is especially useful when the opening crosses framing members. Installers can identify structural limitations before cutting begins. They can also handle trim and surrounding ceiling repairs afterward.
For visible finish work, review Homoya’s ceiling texture guide before matching the surrounding surface. Texture differences can make a technically sound installation look unfinished. Planning the finish before cutting saves extra patching later.
Installation Planning Checklist
Before buying or installing a system, confirm these points:
- Measure the rough opening in several places.
- Measure the finished floor-to-ceiling height.
- Confirm the joist or truss direction.
- Check for wires, pipes, ducts, or other obstructions.
- Measure the required swing and landing clearance.
- Confirm the manufacturer’s duty rating.
- Review handrail and tread safety features.
- Plan weatherstripping and insulation around the opening.
- Check local permit and fire-separation requirements.
- Arrange professional help if structural framing needs modification.
This checklist prevents common sizing and placement errors. It also helps you compare different products using the same criteria. Keep the manufacturer’s installation sheet available during the entire project.
Common Mistakes to Avoid
Buying before measuring is one of the easiest mistakes to avoid. Product dimensions can vary even within the same general category. Existing ceiling openings are not always standard sizes.
Another mistake is focusing on ladder cost while ignoring installation conditions. Moving wiring or modifying framing can cost more than the product. Evaluate the complete project before choosing a model.
Poor air sealing can also create long-term comfort problems. Treat the access panel like part of the home’s exterior thermal boundary. Weatherstrip the perimeter and insulate or cover the door properly.
Finally, don’t continue using damaged hardware because the ladder still opens. A loose hinge, bent rail, or failing spring can become dangerous. Repair or replace damaged components before using them again.
Frequently Asked Questions
How much do attic stairs cost?
Many standard professional installations cost roughly $400 to $1,000 in the United States. Product choice and framing work create much of that variation. Custom installations, tall ceilings, or structural changes can substantially increase the total.
Are aluminum or wooden models better?
Neither material is automatically better for every house. Aluminum is lightweight and corrosion-resistant, while wood can feel solid and cost less. Compare duty rating, tread design, insulation, and hardware before deciding.
Can I install a pull-down ladder myself?
Experienced DIY homeowners may replace a unit when the existing opening already fits. Creating or enlarging an opening makes the job much harder. Hire qualified help when joists, trusses, utilities, or code requirements are involved.
Should an attic access door be insulated?
Yes, especially when the attic is outside the conditioned living space. ENERGY STAR recommends weatherstripping and insulation around attic access points. A tight, insulated cover reduces unwanted air movement and heat transfer.
What load capacity should I choose?
Use a rating that comfortably covers the user, clothing, tools, and carried items. Never exceed the manufacturer’s stated duty rating. Higher ratings can also provide heavier hardware and more substantial construction.
Do attic ladders need a handrail?
Requirements can vary by product and local rules. A secure handrail or grab point can improve balance during climbing. Check both the manufacturer’s instructions and local building requirements before installation.
Choose Access That Fits the House
Good attic access starts with accurate measurements and realistic usage needs. Compare clearance, material, capacity, insulation, and safety before focusing on appearance. The correct choice should operate smoothly without forcing the surrounding space to adapt.
Plan structural and finishing work before making any ceiling cuts. Use professional help when framing or building-code issues exceed your experience. Once installed, inspect the hardware periodically and keep the access area sealed, insulated, and unobstructed.