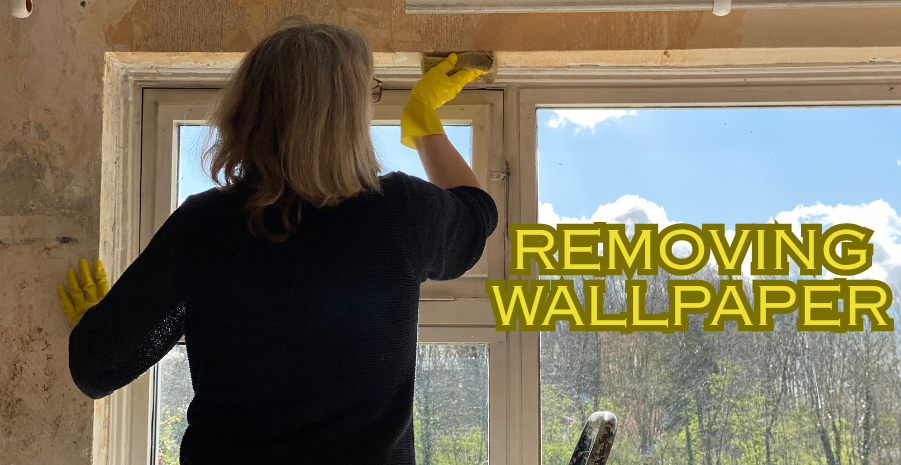
Wallpaper removal has a reputation for being a weekend-ruining job, and that reputation is mostly earned by people who skip the first ten minutes. Almost every horror story – gouged drywall, glue that will not budge, paint bubbling six months later – traces back to using the wrong method for the wallpaper actually on the wall.
This guide works in the order the job actually happens: identify what you are removing, pick the method that matches it, strip it, then deal with the adhesive and the wall underneath. Get the identification step right and most rooms come off in an afternoon.

Start Here: Identify What You Are Removing
Pick a corner at eye level, slide a putty knife under the edge, and pull. What happens in the next five seconds tells you which method to use.
| What happens when you pull a corner | What you have | Best method | Difficulty |
|---|---|---|---|
| Whole sheet lifts away cleanly in one piece | Strippable vinyl (most paper hung after ~1995) | Dry stripping | Easy |
| Top colour layer peels off, leaving a grey or beige paper backing | Peelable wallpaper | Dry strip the face, then soak the backing | Easy to moderate |
| Small flakes tear off, wall stays wet-looking underneath | Traditional paper on primed drywall | Hot water soak | Moderate |
| Nothing lifts, surface feels plasticky and repels water | Solid vinyl or washable paper | Score first, then steam | Hard |
| Paper tears and drywall paper comes with it | Hung on unprimed drywall | Steam, work slowly, expect repairs | Hard |
| Surface is glossy and paint-like, edges are painted over | Painted-over wallpaper | Score heavily, then chemical stripper | Hardest |
If different walls in the same room behave differently – common where an accent wall was added later – treat each wall as its own job rather than forcing one method across the room.
How Long It Takes and What It Costs
A single 12 x 12 ft room of strippable vinyl is genuinely a two to three hour job. The same room in painted-over paper on unprimed drywall can take two full days once you count the skim coating afterwards.
| Scenario | DIY time (12 x 12 room) | Professional cost |
|---|---|---|
| Strippable vinyl, single layer | 2 – 3 hours | $0.80 – $1.00 per sq ft |
| Traditional paper, soak method | 5 – 8 hours | $1.00 – $3.00 per sq ft |
| Stubborn vinyl or two layers, steamed | 1 – 2 days | $3.00 – $8.00 per sq ft |
| Whole average room, dry strip or steam | – | $320 – $1,200 |
| Kitchen | – | $200 – $1,050 |
| Bathroom | – | $160 – $900 |
Handypersons typically charge $50 to $80 an hour for removal, and most will quote by the room rather than the hour once they have seen the walls. If your home was built before 1980 and you find a textured or backed material you cannot identify, stop and have it tested – asbestos-containing wall coverings run $5 to $15 per square foot to remove properly.
Prepare the Room First
Ten minutes of preparation prevents the two most expensive mistakes: water in an electrical box, and adhesive-soaked water soaking into flooring.
- Switch off power to the room at the breaker if you are using any wet method. Remove outlet and switch plates and tape over the openings.
- Lay plastic sheeting over the floor and tape it up the baseboard by 4 to 6 inches so runoff collects on the plastic rather than behind the trim.
- Move furniture out or group it centrally and cover it. Wallpaper adhesive dries to a film that is difficult to get off upholstery.
- Tape off crown molding, baseboards and door casings, especially if you are using a chemical stripper.
- Open a window and set up a fan. Steam raises room humidity fast, and strippers need ventilation.
Method 1: Dry Stripping
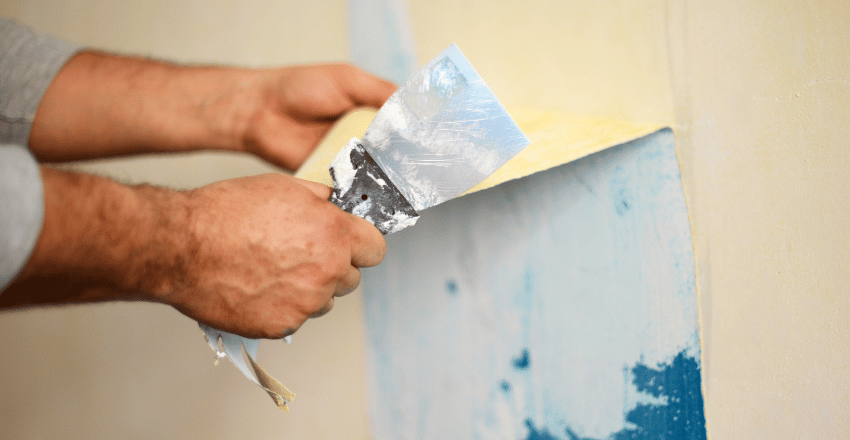
This is the method to try first every single time, because it costs nothing and takes thirty seconds to rule out. Loosen a corner with a putty knife or a stiff plastic scraper, then pull down and toward yourself at roughly a 15 degree angle to the wall – not straight out. Pulling straight out is what tears the sheet and lifts drywall facing.
If the sheet comes away but leaves a paper backing behind, that backing still has to come off. Do not paint over it. Soak it with warm water using the method below; backings are usually porous and release within ten minutes.
Method 2: Hot Water Soak
The cheapest wet method and the right choice for traditional paper. Heat matters more than any additive – water at around 120 to 140 F works far faster than lukewarm water.
- Mix hot water with a few drops of dish soap, or one part liquid fabric softener to three parts hot water. Both act as surfactants that help water penetrate.
- Score the surface first only if the wallpaper is water-resistant. Porous paper does not need scoring.
- Apply generously with a garden sprayer, pump sprayer or sponge, working one 3 x 3 ft section at a time.
- Wait 10 to 15 minutes. This is the step people rush. The adhesive needs time to rehydrate, not just get wet.
- Re-wet the section, then scrape with a 4 inch putty knife held at a low angle. If you have to force it, wet it again and wait longer.
Work from the top of the wall down so runoff keeps the lower sections damp while you work.
Method 3: Steaming
A rented wallpaper steamer costs about $25 to $45 a day and is the right tool for old, multi-layered or heavily adhered paper. Steam drives heat and moisture deeper than spraying does.
Hold the steamer plate flat against the wall for 20 to 30 seconds, then move it to the adjacent area and scrape the section you just steamed while it is still hot. Wear gloves and long sleeves – the plate and the condensate are both hot enough to scald.
The main risk with steaming is over-saturating drywall. If the surface starts to feel spongy under the scraper, stop steaming that area, let it dry for a few hours, and come back to it. Steam is also the method most likely to loosen joint compound at seams, so plan on some touch-up drywall taping if the paper was hung directly over unfinished board.

Method 4: Chemical Strippers
Enzyme-based and gel strippers dissolve adhesives that heat alone will not break. They are the last resort, not the first, because they add cost, fumes and a rinsing step.
Apply according to the label – most need 15 to 20 minutes of dwell time and must stay wet to keep working, so gels outperform thin liquids on vertical surfaces. Ventilate the room, wear nitrile gloves and eye protection, and rinse the wall thoroughly afterwards. Stripper residue left on the wall is a common cause of paint failing to adhere later.
Scoring: Helpful, and Easy to Overdo
A scoring tool perforates the wallpaper so water or stripper can reach the adhesive. It is essential on vinyl and washable papers and unnecessary on porous paper.
Use light pressure and move the tool in overlapping circles. The perforations should break the wallpaper face only. Pressing hard enough to feel the tool bite into the wall means you are punching hundreds of holes into drywall that all need filling later – one of the most common self-inflicted repair jobs in this whole project.
Drywall or Plaster? It Changes the Approach
Knock on the wall. A hollow, drummy sound between studs means drywall; a dense, solid sound usually means plaster over lath.
- Drywall is paper-faced and vulnerable. Its facing absorbs water and delaminates, so limit soak time, keep the scraper angle low, and never let a section stay saturated for more than about 20 minutes.
- Plaster is far more forgiving of water and heat. You can soak it aggressively and steam it for longer, which is why old homes often strip more easily than newer ones despite the paper being older.
If drywall facing does tear, do not keep scraping the damaged area. Let it dry fully, seal the fuzzy spot with an oil-based or shellac primer to stop it swelling further, then skim it flat with joint compound.
Tools and Materials
- 4 inch and 2 inch stiff putty knives, or plastic scrapers if you are nervous about gouging
- Pump or garden sprayer, plus sponges
- Scoring tool (only if you have vinyl or washable paper)
- Wallpaper steamer, rented or borrowed, for stubborn jobs
- Plastic sheeting, painters tape, drop cloths
- Bucket, warm water, dish soap or fabric softener
- Nitrile gloves, safety glasses, and a mask if you are using chemicals
- Joint compound, sanding sponge and a stain-blocking primer for the repair stage
- Step ladder
Getting the Adhesive Residue Off
This is the step that decides whether your paint job lasts. Wallpaper paste is water-soluble and will reactivate under fresh paint, causing bubbling, streaking and peeling weeks later.
Wash the entire wall with hot water and a few drops of dish soap, or a 1:3 white vinegar and hot water mix, using a sponge rather than a soaking wet rag. Rinse with clean water and change the water often – reusing glue-laden water just redistributes the paste. Run your hand over the dry wall afterwards: any tackiness at all means there is still adhesive present.
Repairing and Priming Before You Paint
Once the wall is clean and fully dry, fill nail holes, scoring marks and torn spots with lightweight joint compound, feathering the edges. Sand with a fine sanding sponge, then vacuum and wipe the dust off.
Prime before painting, without exception. A stain-blocking primer seals any residual adhesive and gives the topcoat a uniform surface to grip. Bare patched drywall is thirsty compared with the surrounding wall, so read our guide to how many coats of primer new drywall needs before deciding on one coat or two. If you are also planning to address a dated ceiling while the room is empty, removing popcorn ceilings is far easier before the walls are finished.

If the Wallpaper Was Painted Over
Paint seals the wallpaper surface, so water and steam cannot reach the adhesive at all. Score the surface far more thoroughly than you would bare paper, then use a gel stripper and give it the full dwell time. Expect this to take two to three times as long as normal removal.
There is a legitimate case for leaving it. If the painted wallpaper is firmly bonded with no lifting seams or bubbles, and the wall is otherwise sound, skim coating over it with joint compound produces a smooth paintable surface with far less risk than a fight to remove it. This only works when the paper is genuinely well adhered – test several areas first. Also worth reading: Brass Cleaner.
When to Call a Professional
- Three or more layers of wallpaper, which is common in homes from the 1960s and 70s
- Wallpaper hung directly onto unprimed drywall, where removal reliably damages the board
- Any pre-1980 wall covering you cannot identify, which should be tested before disturbing
- Large or high-ceilinged spaces on a deadline
- Plaster walls already showing cracks or hollow spots, where steam can worsen existing damage
Mistakes That Cost the Most Time
- Not waiting long enough after wetting. Ten minutes of patience saves an hour of scraping.
- Scoring too deeply. Every perforation in the drywall is a spot to fill and sand.
- Using a metal scraper at a steep angle. Keep it under about 30 degrees to the wall.
- Skipping the adhesive wash. The single most common cause of paint failure afterwards.
- Painting before the wall is fully dry. Give it at least 24 hours after the final rinse.
- Leaving debris to dry on the floor. Bag wet scraps as you go; dried paste bonds to almost anything.

Conclusion
Removing wallpaper rewards diagnosis over effort. Test a corner, match the method to what you find, give water and steam the time they need to work, and treat the adhesive wash as part of the job rather than an optional extra. Do that and even difficult rooms come off predictably.
The finish you get afterwards depends almost entirely on what you do between stripping and painting – the patching, the sanding and the primer. That is where a stripped wall becomes a finished one. For more projects in this vein, browse our Cleaning category.
Frequently Asked Questions
Can I paint over wallpaper instead of removing it?
It is possible but rarely advisable. Paint adds moisture that can loosen the adhesive, and any seam or bubble telegraphs through the finish. It is only a reasonable option when the paper is a single layer, firmly bonded everywhere, and you skim coat over it first with joint compound.
How long does wallpaper removal take?
A 12 x 12 ft room of strippable vinyl takes about two to three hours. Traditional paper that needs soaking takes five to eight hours. Multiple layers or painted-over wallpaper can take one to two full days including repairs.
Does removing wallpaper damage drywall?
It can, particularly if the drywall was never primed before the paper was hung. Damage is usually limited to torn facing paper, which is repaired by sealing the area with a stain-blocking primer and skimming it with joint compound.
What is the easiest way to remove wallpaper?
Dry stripping, when the wallpaper allows it. Always test a corner first – modern strippable vinyl often peels off in whole sheets with no water at all. For anything that resists, a steamer is the most effective single tool.
Does fabric softener actually work for removing wallpaper?
Yes, though the effect comes mostly from the hot water. Fabric softener acts as a surfactant that helps water penetrate the paper face. A 1:3 softener-to-hot-water mix works about as well as dish soap and hot water.
Do I have to wash the wall after removing wallpaper?
Yes. Wallpaper paste is water-soluble and reactivates under fresh paint, causing bubbling and peeling. Wash with hot soapy water or a vinegar solution, rinse with clean water, and check for tackiness once dry.
How much does professional wallpaper removal cost?
Expect $0.80 to $1.00 per square foot for straightforward dry stripping, $1.00 to $3.00 for steaming, and $3.00 to $8.00 for difficult soaking and scraping jobs. Most average rooms fall between $320 and $1,200.