Introduction
Dealing with damaged fasteners is a common frustration in DIY and repair projects, which is why learning how to remove stripped screws is an essential skill. A stripped screw occurs when the head becomes worn or damaged, making it difficult to grip with a standard screwdriver. This often happens due to using the wrong tool size, applying too much torque, or dealing with rust and corrosion. Knowing the right tools and techniques can save time, prevent further damage, and ensure your project stays on track.
| Sections | Details |
| What is a Stripped Screw? | A screw with a damaged head, making it hard to turn, was caused by the wrong screwdriver size, excessive torque, or rust/corrosion. |
| Tools Needed | – Screwdriver set (various sizes) – Pliers (needle-nose/locking) – Rubber band – Drill & HSS bits – Screw extractor kit – Hammer – WD-40/penetrating oil – Dremel/rotary tool – Safety goggles |
| How To Remove Stripped Screws | 1. Pliers – Grip and turn if the head is exposed. 2. Rubber Band – Adds grip for lightly stripped screws. 3. Screw Extractor – Drill hole → insert extractor → turn counterclockwise with steady pressure. 4. Dremel Tool – Cut a new slot for a flathead screwdriver. 5. Left-Handed Drill Bits – May catch and pull the screw out while drilling. 6. Impact Driver – Uses torque and impact to free stubborn screws. |
| Tips to Prevent Damage | – Use the correct screwdriver size/type – Apply penetrating oil on rusted screws – Avoid over-torquing – Drill pilot holes before inserting screws – Prevent cross-threading |
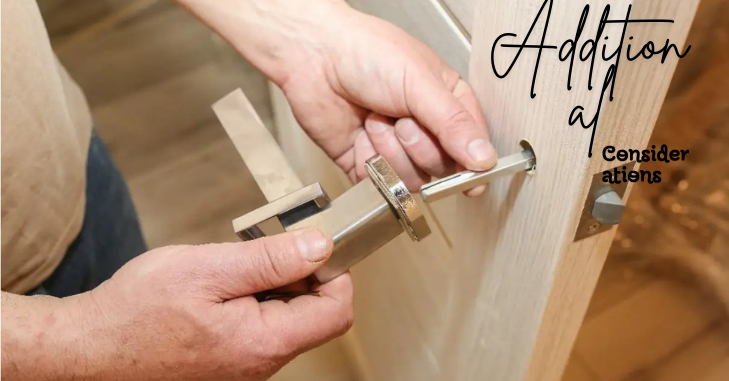
| Additional Considerations | – Replace damaged screws (larger screw/anchor if hole is damaged) – Seek professional help for stubborn cases – Always wear safety goggles & work safely – Be patient to avoid injury or damage |
| Conclusion | With proper tools and patience, stripped screws can be removed efficiently. Knowing multiple methods improves success and prevents further damage. |
Understanding Stripped Screws
A stripped screw occurs when the head of the screw becomes damaged, making it difficult to turn with a standard screwdriver. The incorrect screwdriver size, too much torque, rust, and corrosion can all cause this damage. Understanding how to effectively address this issue is crucial for maintaining the integrity of your projects.
Tools You Will Need

Before attempting to remove stripped screws, gather the necessary tools. Having the right equipment on hand can save time and reduce frustration. Here’s a list of essential tools:
- Screwdriver Set: A quality set with various sizes and types (Phillips, flathead, Torx) is vital. To stop additional stripping, make sure you have the right size.
- Pliers: Needle-nose or locking pliers can grip the screw head, allowing you to turn it manually.
- Rubber Band: A thick rubber band can provide additional grip when placed over the stripped screw head.
- Drill and Drill Bits: If the screw is severely stripped, you may need to drill it out. It should be sufficient to use a set of high-speed steel (HSS) drill bits.
- Screw Extractor Kit: This specialized tool is designed specifically for removing stripped screws. It usually includes a drill bit and an extractor.
- Hammer: A small hammer can help seat the extractor if you’re using one.
- WD-40 or Penetrating Oil: These can help loosen rusted or corroded screws, making removal easier.
- Dremel Tool or Rotary Tool: If the screw head is too damaged, you can use a Dremel to create a new slot for a screwdriver.
- Safety Goggles: Protect your eyes when drilling or using other power tools.
Methods for How To Remove Stripped Screws
Using Pliers
The simplest approach is frequently to use pliers if the screw head is above the surface. Grip the screw head with locking pliers and turn counterclockwise. This method works best for screws that are not deeply embedded or rusted.
Rubber Band Method
For screws that are slightly stripped but still have some grip, place a thick rubber band over the screw head. Insert the screwdriver into the rubber band and turn. The rubber provides extra friction and can help remove the screw without further stripping.
Screw Extractor
If the screw is severely stripped, a screw extractor kit can be very effective. Here’s how to use it:
- Drill a Hole: Use the drill bit included in the extractor kit to create a hole in the center of the screw head. The extractor should be able to fit into the hole.
- Insert the Extractor: Choose the appropriate size extractor, insert it into the hole, and turn it counterclockwise. Because of its design, the extractor can hold onto the screw while you rotate it.
- Apply Steady Pressure: Maintain firm, steady pressure as you turn the extractor. This method often requires patience, as excessive force can break the extractor.
Dremel Tool
If the screw head is too damaged for any conventional methods, a Dremel tool can help. Use a cutting disc to create a new slot in the screw head. Once you have a slot, turn it with a flathead screwdriver. Take your time because this method requires accuracy.
Left-Handed Drill Bits
Because left-handed drill bits rotate counterclockwise, they occasionally catch and extract the screw while you’re drilling. To remove the screw, start with a small bit to make a pilot hole and then move on to a larger left-handed bit.
Impact Driver
If you have access to an impact driver, this tool can provide the necessary torque to loosen stubborn screws. Attach the appropriate bit, set the driver to reverse, and apply pressure while it turns. The impact action can help free the screw without stripping it further.
Tips to Prevent Further Damage

Preventing additional damage to stripped screws is essential for successful removal. Here are some tips:
- Use the Right Tools: Always ensure you are using the correct size and type of screwdriver for the screw. Using a mismatched tool increases the risk of stripping.
- Apply Penetrating Oil: If the screw is rusted or corroded, apply penetrating oil and allow it to soak for a few minutes before attempting removal.
- Avoid Over-Torquing: When tightening screws, avoid excessive force. Over-torquing can lead to stripping.
- Drill a Pilot Hole: When installing new screws, especially in hardwood or metal, drill a pilot hole to reduce the chance of stripping.
- Check for Cross-Threading: Ensure that screws are aligned correctly when inserting them. Cross-threading can cause stripping and make removal difficult.
Additional Considerations
Replacement Screws
After successfully removing a stripped screw, consider replacing it with a screw of the same size and type. If the hole is damaged, you might need to use a larger screw or a wall anchor for a secure fit.
Professional Help
If you encounter a particularly stubborn stripped screw or if your attempts at removal are unsuccessful, don’t hesitate to seek professional assistance. A handyman or contractor has experience with these situations and can often remove screws without causing further damage.
Safety Precautions
Always prioritize safety when working with tools. Wear safety goggles to protect your eyes from debris, and work in a well-ventilated area, especially when using penetrating oils or power tools.
Practice Patience
Removing stripped screws can be frustrating, but patience is key. Hurrying the procedure could result in more harm or damage. Take your time to evaluate the situation and choose the best method for removal.
Conclusion
Removing stripped screws doesn’t have to be a daunting task. With the right tools and methods, you can effectively address this common issue. You can save time and frustration by becoming familiar with different methods, like using pliers, rubber bands, screw extractors, and even Dremel tools.
By following the tips outlined in this guide, you can prevent further damage to both the screws and the materials you’re working with. Whether you’re a seasoned DIYer or a novice, understanding how to approach stripped screws will enhance your skill set and confidence in tackling home improvement projects.
In the end, remember that every problem has a solution, and with patience and the right approach, you can overcome the challenge of stripped screws.
Want to know about “Guide to Taping Drywall Like a Professional: A Complete Step-by-Step Guide to Tools, Techniques, and Common Mistakes to Avoid” Check out our “Crafts & Tools” category.
FAQs
If you have your toolbox nearby but forgot your screwdriver, don’t worry! Pliers can do the job if you have them on hand. Particularly useful are needle-nose pliers. To unscrew the screw head, just use the pliers to grasp its sides and rotate it counterclockwise.
Drill a tiny hole in the middle of the stripped screw with a metal-bit.
Insert a Phillips head bit into the drill bit and insert it into the stripped screw’s head.
Try using the new hole in the screw’s head as leverage by reversing your drill and trying to pull it out.
QUICKLY EXTRACT STRIPPED SCREWS: Remove damaged screws with ease! With minimally stripped or lightly damaged screw heads, our Solder-It Screw Grab liquid anti-seize compound quickly creates up to 800% positive grip.