Peel-and-stick floor tile can change a room’s look without the cost, tools, or disruption of a traditional flooring project. These self-adhesive tiles are especially appealing to U.S. homeowners and renters who want an affordable update they can install themselves. The result depends heavily on choosing the right product, preparing the surface correctly, and using it in a room that suits this type of flooring.
Peel-and-stick flooring is a self-adhesive vinyl option designed for quick DIY updates. It performs best on smooth, clean, dry, level surfaces and suits many kitchens, laundry rooms, bedrooms, and low- to moderate-traffic spaces. Its main strengths are affordability and simple installation, while its biggest limitation is its dependence on good surface preparation.
Key Facts at a Glance
| Factor | What to Know |
|---|---|
| Typical U.S. material cost | About $1–$5 per square foot for many flooring products |
| Common material | Vinyl or similar resilient material |
| Installation | Self-adhesive backing; usually no separate mortar or glue |
| Best surface | Smooth, clean, dry, solid, and level |
| Common uses | Kitchens, laundry rooms, bedrooms, closets, powder rooms |
| Water performance | Tile surfaces may resist water, but seams can remain vulnerable |
| DIY difficulty | Beginner-friendly when surface prep is straightforward |
| Removal | Varies by product, adhesive, subfloor, age, and installation conditions |
| Extra material | Around 10% extra is a useful starting point for cuts and mistakes |
Current U.S. cost guidance places many peel-and-stick flooring products around $1 to $5 per square foot, although design, thickness, brand, and construction can move prices outside that range. The main savings often come from DIY installation because there is no mortar-setting process or click-lock system to assemble. Surface preparation still takes time, so the lowest-priced box isn’t automatically the lowest-effort option.
Is Peel and Stick Floor Tile Worth It?
For a fast cosmetic upgrade, peel-and-stick floor tile can offer strong value when expectations match the product. It makes the most sense when you want to improve an outdated surface without committing to a major demolition or professional flooring installation. It is less compelling when you need a floor to handle constant moisture, heavy traffic, major subfloor movement, or decades of service.
The biggest advantages are straightforward installation, broad design choice, low floor-height buildup, and the ability to replace individual damaged pieces in many installations. Tradeoffs include possible edge lifting, visible subfloor imperfections, adhesive sensitivity, and a shorter service life than many thicker permanent flooring systems. Current consumer guidance consistently emphasizes that surface condition and room environment strongly affect performance.
Main advantages
- Lower material cost than many traditional flooring choices.
- DIY-friendly installation with basic hand tools.
- Wood, stone, marble, geometric, and patterned designs.
- Thin profile that can reduce transition-height problems.
- You can often replace individual tiles if one becomes damaged.
- Useful for quick updates where full flooring replacement is impractical.
Main disadvantages
- Adhesive can weaken if the surface is dusty, uneven, damp, or unsuitable.
- Thin tiles can reveal bumps, grout lines, cracks, and other imperfections.
- Seams may let moisture reach the adhesive or the floor below.
- Edges can curl in difficult temperature or humidity conditions.
- Removal may leave residue or affect the underlying finish.
- It is usually a weaker long-term choice than quality click-lock vinyl or ceramic tile.
How Peel-and-Stick Flooring Compares With Other Options
Choosing a floor is easier when you compare the project, not just the pattern. A renter refreshing a small laundry room has different priorities from a homeowner rebuilding a main bathroom. The table below shows where common flooring choices tend to fit.
| Flooring Type | DIY Ease | Water Considerations | Durability | Typical Best Fit |
|---|---|---|---|---|
| Peel-and-stick vinyl | Easy | Surface can resist water; seams need care | Light to moderate | Fast cosmetic updates |
| Sheet vinyl | Moderate | Few seams can help in damp areas | Moderate | Kitchens, baths, utility rooms |
| Click-lock LVP | Moderate | Many products handle moisture well | Moderate to high | Longer-term residential use |
| Ceramic or porcelain tile | Difficult | Strong wet-area option when correctly installed | High | Bathrooms, entries, permanent renovations |
Recommendation: choose self-adhesive tile when low cost, simple installation, and design flexibility matter more than maximum lifespan. Choose click-lock luxury vinyl when you want a more substantial long-term floor without moving all the way to ceramic installation. For a heavily wet room, evaluate the entire flooring assembly rather than relying on a “waterproof” label printed on the tile package.
Where This Flooring Works Best
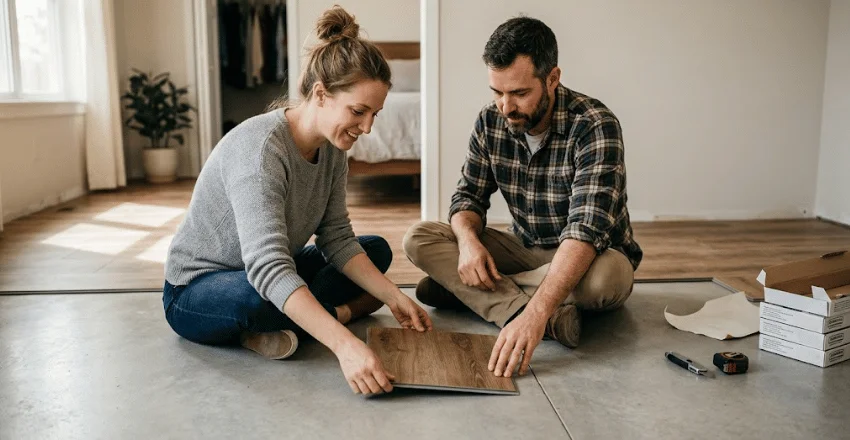
Bedrooms, closets, home offices, laundry spaces, powder rooms, and many kitchens can be sensible candidates if the existing floor is stable and smooth. Small projects are especially forgiving because fewer seams and cuts make alignment easier to control. In any room, check the manufacturer’s approved surfaces before assuming the adhesive will bond correctly.
Bathrooms deserve extra care because a waterproof vinyl surface does not automatically make every seam or adhesive layer waterproof. Standing water can work through tile joints and reach the material underneath, weakening the bond or creating problems below the finish layer. If you are planning a broader bathroom renovation, Homoya’s bathtub plumbing guide also explains why controlling leaks and moisture around bathroom surfaces matters.
Basements require the same caution because moisture can come through concrete, not just from spills above. Before choosing any finish for a lower level, make sure the slab or subfloor is suitable and any moisture problem has been addressed first. Homoya’s guide to finishing a basement covers flooring alongside waterproofing, ventilation, insulation, and other lower-level planning issues.
Garages and converted utility areas create another challenge because temperature changes, vehicle loads, tools, and rough concrete can stress thin adhesive flooring. A converted garage used as an office or hobby room differs from an active vehicle bay, so the room’s final purpose should guide your floor choice. See Homoya’s garage conversion planning guide and garage workshop guide when flooring is part of a larger garage project.
Surface Preparation Matters More Than Most Buyers Expect
Peel-and-stick products need a surface that is clean, flat, dry, and structurally sound. Dust, grease, wax, loose paint, deep grout joints, holes, and bumps can reduce adhesive contact or show through a thin tile. Lowe’s current installation guidance similarly recommends cleaning, repairing, leveling, measuring, and dry-fitting the surface before removing the backing.
Existing tile can sometimes work as a base, but deep grout lines may need filling so they do not telegraph through the new finish. Concrete can also be suitable for certain products, provided it meets the manufacturer’s moisture and surface requirements. Do not add a random adhesive or primer unless the flooring manufacturer specifically permits it, because incompatible products can create a different bonding problem.
A Practical Installation Sequence
- Check the product instructions. Confirm approved subfloors, room temperature, acclimation requirements, and moisture restrictions.
- Remove loose dirt and residue. Vacuum thoroughly, then clean grease or other contaminants that could interfere with the adhesive.
- Repair and level the surface. Fill holes, cracks, deep grout lines, or other depressions that could show through the finished floor.
- Measure and plan the layout. Establish reference lines and dry-fit tiles so narrow cuts do not collect along one wall.
- Cut before sticking where possible. Use a straightedge and sharp utility knife appropriate for the product.
- Apply each piece carefully. Peel the backing, align the tile, and press from one side toward the other to limit trapped air.
- Apply firm pressure. Follow the manufacturer’s instructions for rolling, pressing, cure time, and when normal traffic can resume.
A dry layout is worth the extra few minutes because adhesive-backed pieces can be difficult to reposition after firm pressure is applied. Center lines can also keep a square pattern from gradually drifting across the room. Lowe’s recommends dry fitting before final placement for the same reason.
7 Buying Tips That Improve the Finished Result
Start with the room, not the design. A beautiful marble print won’t fix a damp subfloor, and a bargain product may disappoint if it is too thin for the traffic it gets. Use these seven checks before ordering.
- Confirm the product is rated for floors. Wall stickers and backsplash sheets may not be designed for foot traffic.
- Check the approved subfloors. Match the flooring to your actual surface rather than assuming all adhesive tiles work everywhere.
- Compare thickness and wear construction. Thicker products may hide minor imperfections better, but specifications vary by manufacturer.
- Read water claims carefully. “Waterproof material” and a completely waterproof installed floor are not the same claim.
- Order enough for waste. Around 10% extra is a practical starting point for routine cuts and mistakes.
- Buy the same lot when possible. Ordering the project quantity together can reduce visible color or pattern variation.
- Test a sample first. Check color, texture, adhesion, removal behavior, and how the tile looks under the room’s actual lighting.
A sample can answer questions that online photos cannot, especially when the design imitates wood grain or stone. It also lets renters test the adhesive in an inconspicuous location before covering an entire room. Product-specific instructions should still control the final installation because adhesive formulas and surface requirements vary.
How Durable Is Self-Adhesive Vinyl Flooring?
No single lifespan applies to every adhesive tile. Current guides give ranges from a few years to roughly a decade for many products, with installation quality, traffic, moisture, temperature, tile thickness, and adhesive performance changing the outcome. A well-prepared guest room can therefore age differently from a busy entry or humid bathroom.
Routine care is simple for most vinyl surfaces, but harsh scrubbing, excess standing water, and dragging furniture can shorten the finish’s useful life or damage seams. Sweep or vacuum grit before it scratches the wear surface, and follow the manufacturer’s approved cleaning directions. If one tile becomes damaged, replacing that piece may be easier than repairing a continuous floor.
Is It a Good Choice for Renters?
Self-adhesive flooring is often marketed as renter-friendly, but removability is not guaranteed in every home. The result depends on the adhesive, how long it stays installed, heat exposure, and the finish underneath it. A product that releases cleanly from one surface can leave residue or pull finish from another.
Renters should get permission when a lease requires it and test a small hidden area before committing to a full room. Keep the original product instructions and removal guidance because controlled heat or a recommended adhesive remover may be needed later. Treat claims such as “no residue” as product-specific promises rather than a universal feature of the entire category.
Frequently Asked Questions
Is peel and stick floor tile waterproof?
Many vinyl tiles have surfaces that resist water, but that does not mean the completed floor is a sealed waterproof system. Water can reach seams, edges, adhesive, or the subfloor if it remains on the surface. Bathrooms and other wet areas therefore require product-specific approval plus careful control of leaks and standing water.
Can I install self-adhesive tiles over existing flooring?
Sometimes, provided the existing flooring is stable, smooth, clean, dry, and approved by the tile manufacturer. Deep grout joints, loose flooring, textured surfaces, or damaged sections can show through or weaken the new adhesive bond. Preparing the old surface is usually more important than confirming what’s underneath it.
How much should I buy?
Measure the room in square feet and compare that total with the coverage stated on each package. Buying about 10% extra is a sensible starting point for ordinary trimming, damaged pieces, and layout adjustments, though complicated rooms can require more. Keeping a few unused pieces after installation can also make future spot replacement easier.
Do I need extra glue?
Many products are designed to use their factory-applied adhesive without separate glue. Some manufacturers may permit or recommend an additional compatible adhesive for particular subfloors, so the package instructions should decide the issue. Adding an unapproved glue can make installation and later removal more difficult.
What causes the edges to lift?
Weak adhesion often starts with dust, grease, moisture, an uneven floor, insufficient pressure, or environmental conditions outside the product’s recommended range. Movement in the surface below can also work against a thin adhesive layer over time. Careful preparation and following the manufacturer’s temperature and curing instructions give the floor a better chance of staying flat.
The Bottom Line
Peel-and-stick flooring works best as a practical, budget-conscious upgrade rather than a universal substitute for every traditional floor. Choose it for the right room, verify the subfloor, buy enough material for cuts, and spend more time on preparation than the simple adhesive backing might suggest. Those choices influence the finished result more than choosing between two similar-looking patterns.
For a broader renovation, consider the floor as one part of the room rather than an isolated finish. Homoya’s basement, bathroom, garage, and conversion guides can help you coordinate flooring with moisture control, plumbing, ventilation, and room use before installation begins. Planning those conditions first gives your DIY flooring project a stronger foundation and a better chance of looking good long after the last tile is set.