
Installing a bathroom fan is essential for keeping your bathroom dry, fresh, and mold-free. This guide explains how to install a bathroom fan step by step, including gathering tools like a screwdriver, power drill, ladder, tape measure, and wire strippers. It also covers safety tips, wiring, duct connection, fan selection, and maintenance. Following these steps ensures smooth installation, proper airflow, and long-lasting performance.
From choosing the right size and type to improving ventilation efficiency, this guide provides clear, practical advice for beginners. By the end, readers will confidently understand the process, ensuring their bathroom stays comfortable, safe, and functional through proper how to install a bathroom fan.
| Basics | Details |
| Gather Tools | Screwdriver, drill, and tape measure ready |
| Ladder Ready | Essential for ceiling fan access |
| Wire Strippers | Needed for connecting electrical wires |
| Safety First | Turn off the bathroom power supply. |
| Power Test | Use a voltage tester before work. |
| Remove Old | Detach the old fan or fixture. |
| Measure Ceiling | Mark is opening for a new fan. |
| Cut Opening | Use the drywall saw carefully here. |
| Smooth Edges | Prevent damage to the ceiling surface. |
| Wire Fan | Match black, white, and green wires. |
| Mount Housing | Secure with screws and brackets. |
| Connect Duct | Attach the vent duct outside properly. |
| Install Grille | Snap or screw the cover in place. |
| Select Size | Proper CFM for airflow efficiency |
| Fan Type | Ceiling, inline, or combo unit |
| Maintain Fan | Clean grille, vacuum, check duct |
How To Install A Bathroom Fan? Step-wise Guide
Gather Tools and Materials

Before starting, collect all necessary tools and materials. You will need a screwdriver, power drill, ladder, tape measure, drywall saw, wire strippers, voltage tester, and electrical tape. Many fan kits include screws and mounting brackets. Knowing how to install a bathroom fan starts with preparing everything beforehand. This ensures the installation is smooth and organized, reducing mistakes during the project.
Turn Off Power and Prepare the Area
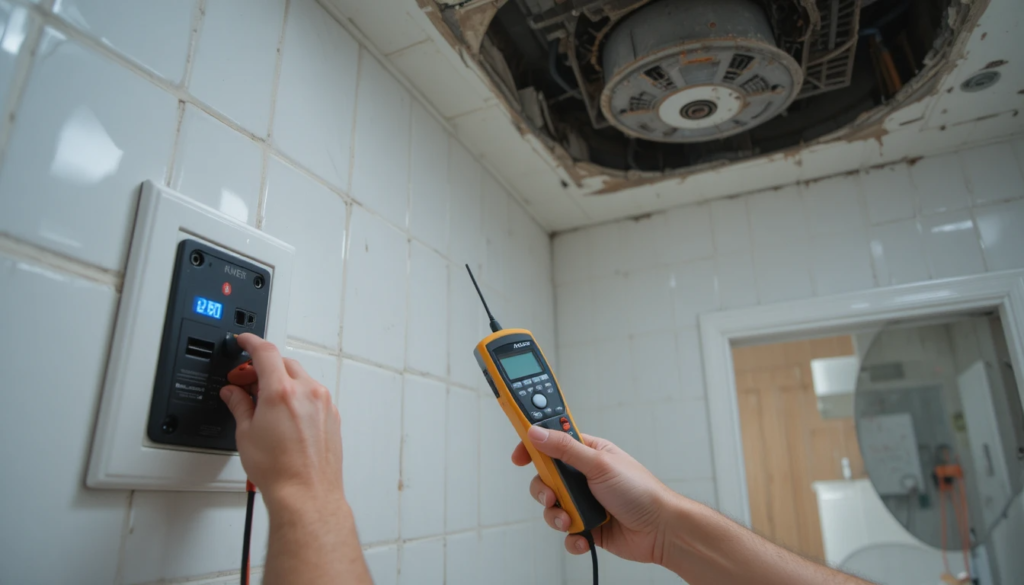
Safety comes first when working with electricity. Locate the circuit breaker that powers the bathroom and turn it off. Use a voltage tester to confirm no electricity is flowing. Remove any existing fan or ceiling fixture if needed. Preparing the area safely is an essential part of install a bathroom fan, preventing shocks or damage while allowing you to work confidently. How to Install a Ceiling Fan is a useful companion read here.
Measure and Cut the Ceiling

Measure the dimensions of your new fan housing and mark the ceiling carefully. Use a drywall saw to cut the opening slightly larger than the fan. Smooth the edges to prevent damage to the ceiling or fan components. Proper cutting is crucial when learning how to install a bathroom fan, as a correctly sized opening ensures the fan fits securely, avoids vibrations, and maintains adequate airflow in your bathroom.
Wire and Mount the Fan

Connect the fan to your bathroom’s electrical system. Match black to black (hot), white to white (neutral), and green or bare copper to the ground. Use wire nuts and electrical tape to secure connections. Insert the fan housing into the ceiling and attach it with screws or brackets. Proper wiring and mounting are essential to install a bathroom fan, ensuring safety, stability, and reliable operation.
Connect the Duct and Install the Cover

Attach the fan to the duct that vents air outside using metal tape or clamps to prevent leaks. Install the fan grille by snapping it into place or screwing it into place. Please turn on the power and test the fan to make sure it runs smoothly and moves air efficiently. This final step is a crucial part of how to install a bathroom fan, ensuring proper ventilation and long-lasting performance.
Choosing the Right Fan Size
Select a fan with the correct capacity based on your bathroom size, usually measured in cubic feet per minute (CFM). An appropriately sized fan ensures sufficient airflow to remove moisture quickly. Understanding to install a bathroom fan also involves knowing the right CFM rating. Choosing the right size prevents mold buildup, reduces energy waste, and ensures the fan operates efficiently without unnecessary noise or strain.
Understanding Fan Types
- Bathroom fans come in ceiling-mounted, inline, or combination light/fan units.
- Consider your bathroom layout, ceiling space, and noise preference before selecting one.
- Knowing to install a bathroom fan also means choosing a type that fits your needs while maximizing ventilation.
- Picking the correct type ensures efficient airflow, keeps the bathroom dry, and integrates well with your bathroom’s design without obstructing lights or fixtures.
Proper Duct Installation
The duct should be straight, free of kinks, and vent directly outside to prevent condensation. Secure the connection with metal tape or clamps. Correct duct installation is a key part of how to install a bathroom fan, ensuring air flows efficiently without leaks. Proper duct placement also reduces noise, prevents backdrafts, and minimizes the risk of mold forming in your ceiling or walls over time.
Maintenance Tips for Longevity
- Regular cleaning helps the fan last longer and maintain efficiency.
- Remove the grille every few months and vacuum it to remove dust and debris.
- Inspect the duct for blockages or damage. Maintaining your fan is an essential part of to install a bathroom fan, keeping airflow strong and quiet.
- Routine upkeep prevents moisture problems, reduces noise, and ensures the fan continues to ventilate your bathroom effectively for years.
Improving Airflow Efficiency
Place the fan near the shower or bathtub for maximum effect and avoid long or twisted duct runs. Ensure the duct is free of obstructions to ensure smooth airflow. Installing a bathroom fan requires proper placement and planning. Optimized airflow reduces humidity, prevents condensation, and keeps the bathroom comfortable. Efficient installation also reduces energy use and extends the life of both the fan and the duct system.
Conclusion
Learning how to install a bathroom fan ensures proper ventilation, reduces moisture, and prevents mold, keeping your bathroom clean and comfortable. Following steps such as gathering tools, cutting the ceiling, wiring, mounting, and connecting the duct ensure a safe and efficient installation.
Selecting the right fan size and performing regular maintenance further improve performance. This guide provides clear, practical instructions, giving homeowners confidence and long-lasting results when understanding how to install a bathroom fan.
Want to know about Replace Sewer Line: An Overview of Causes of Sewer Line Damage, Cost of Replacing a Sewer Line, And More Information Check out our Bathroom category.
FAQs
Always turn off the bathroom power at the circuit breaker and confirm with a voltage tester. Proper precautions prevent shocks and make wiring and mounting safer.
Measure your bathroom’s square footage and select a fan with a suitable CFM rating. Correct sizing improves airflow, efficiently removes moisture, and reduces noise.
The duct should be straight, free of kinks, and vent directly outside—secure connections with metal tape or clamps for efficient airflow and reduced condensation.
Clean the grille and vacuum dust every few months. Check for blockages or loose connections to ensure the fan continues to run quietly and efficiently.
Install the fan near the shower or bathtub. Proper placement ensures maximum moisture removal, improved ventilation, and helps maintain a dry, comfortable bathroom environment.